EmberJS基础
1. 安装Ember.js
1 | npm install -g ember-cli@3.0 |
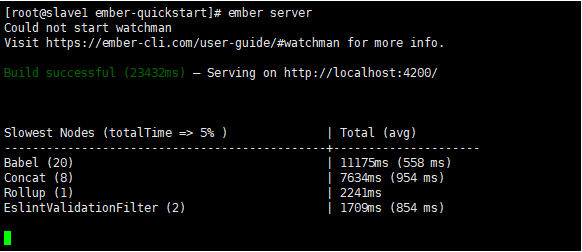
2. 构建应用,并启动服务
1 | 构建应用 |
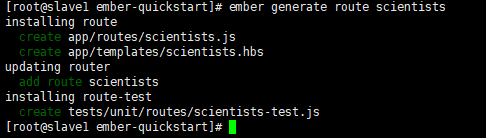
3. 使用ember cli创建一些对应文件
1 | ember generate route scientists |

1
2
ember g component people-list
会生成对应的文件,componments目录下,templates/componments目录下;
4. application.hbs
1 | # 说明 |
5. 需求:遍历一些数据,并增添点击事件
5.1.1
2
3
4
5
6
7
8# 目录:
/app/routes/scientists.js
# 代码
export default Route.extend({
model() {
return ['Marie Curie', 'Mae Jemison', 'Albert Hofmann'];
}
});
5.2.1
2
3
4
5
6
7
8
9
10# 目录:
/app/templats/scientists.hbs
# 代码
<h2>List of Scientists</h2>
<ul>
{{#each model as |scientist|}}
<li>{{scientist}}</li>
{{/each}}
</ul>
# 这时候数据就在页面上展示出来了,ip:4200/scientists
5.3.1
2
3
4
5
6
7
8
9
10
11
12# 还有一种灵动的写法
/app/templats/components/people-list.hbs
# 代码,将变量用花括号包括起来;
<h2>{{title}}</h2>
<ul>
{{#each people as |person|}}
<li>{{person}}</li>
{{/each}}
</ul>
# 将people-list.hbs的内容放在scientists.hbs里面展示
# 代码添加到scientists.hbs末尾:
{{people-list title="List of Scientists111" people=model}}
5.4 action :执行点击事件1
2
3
4
5
6
7
8
9
10
11
12
13
14# js目录:
/app/components/people-list.js
# 代码:
export default Component.extend({
actions:{
showPerson:function(person){
alert(person);
}
}
});
# hbs目录
/app/templats/components/people-list.hbs
# 代码添加,其中方法民后面的person,是参数
<button {{action "showPerson" person}}>{{person}}</button>

6. link-to 使用
1 | 在.hbs文件中,加入 |
7. Index Route
1 | # 背景+需求 |
1 | # 目录 |
8. if的使用
1 | # 说明 |
9. 鼠标事件
1 | mouseEnter:function(){ |
点关注,不迷路
好了各位,以上就是这篇文章的全部内容了,能看到这里的人呀,都是人才。
白嫖不好,创作不易。各位的支持和认可,就是我创作的最大动力,我们下篇文章见!
如果本篇博客有任何错误,请批评指教,不胜感激 !


原文作者: create17
原文链接: https://841809077.github.io/2018/03/23/Ambari/ambari web 二次开发/EmberJS基础.html
版权声明: 转载请注明出处(码字不易,请保留作者署名及链接,谢谢配合!)

